Wordpress as a CMS platform is built for flexibility. Users who wish to move their WordPress website to different servers or a different location of their server do not have to go through the trouble of reinstalling it again. There are techniques and steps one can undertake to do exactly and acquire the result they desire without running into problems. Before that, do ensure that all the information and relevant details have undergone a backup before running through the steps. Once you have done so, you can proceed to move your WordPress website to a new domain by following the steps included below:

In the event that you wish to move domains without having to change the home or site URL of your WordPress website, you can do so in usual cases by simply moving the relevant files. If your WordPress database and URL are to be the same, you can do so by copying the files and database. But if you need to change the name of your database or users, you will need to locate and edit the php file (wp-config) in order to reflect the appropriate values. For security, you can actually begin to test it out before switching it. To do so, you can make use of temporary changes. Temporarily change the home and site URL located in your database through the wp-options section. You can access this through phpMyAdmin and other similar locations.
The Initial Step
You must make sure to check your WordPress site for rewrites of any kind before proceeding further. These are usually seen in the form of permalinks. If you spot any rewrites in your WordPress website, you must check and ensure that the permalinks (.htaccess) have been disabled and reconfigure the permalinks before your WordPress site goes live again.
Change your Domain Name and URLs
If you have to both move your website and change your domain name and URLs, you will need to perform these following steps to successfully do so:

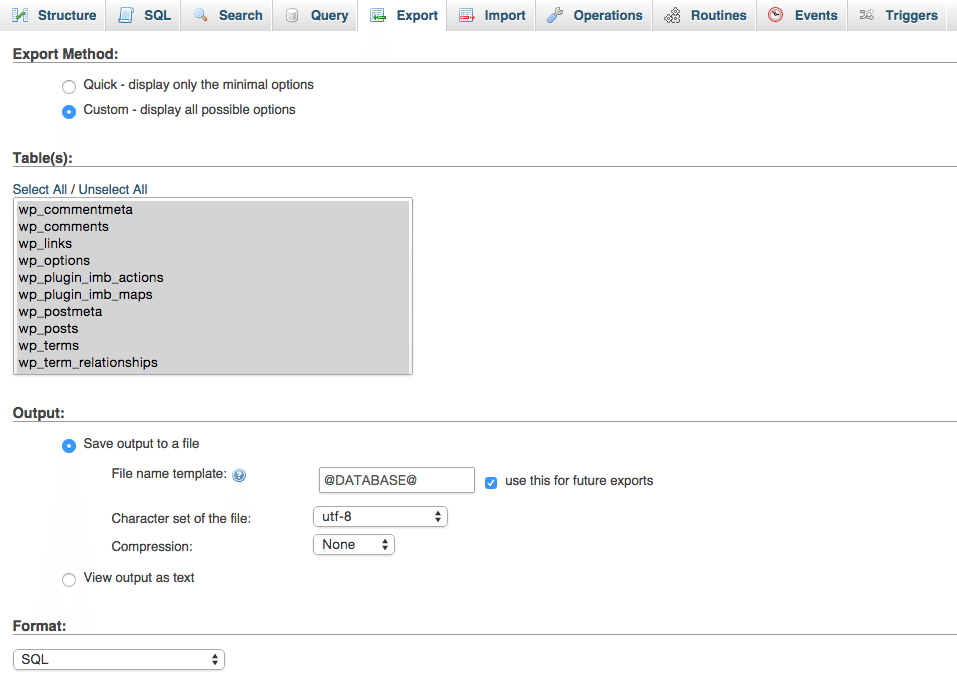
Step 1: First, you will be required to download all existing site files and export your WordPress database. You can do so by accessing the MySQL section.
Step 2: Next, create a new folder in a safe location and move you've backed up files as well as the exported WordPress database into the folder. After which, log in to the WordPress website you wish to move and locate the settings section.
Step 3: There, you will then access the general option and change the URLs manually. After you have finished making the changes, make sure you save the settings. If you have done so accurately, you will see 404 pages when you attempt to access your WordPress website.
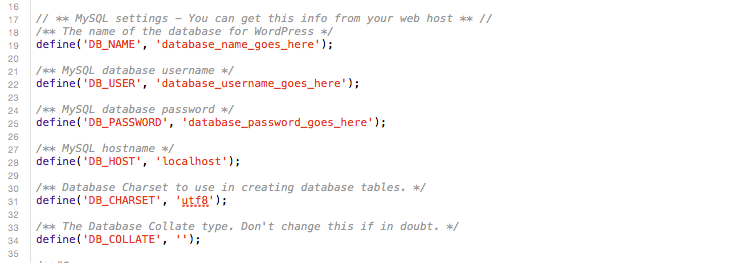
Step4: You will then have to download and export your site files and database again. Upon completion, you will then have to edit the php file (wp-config) again with your new server’s MySQL database name, username, and password before uploading your files.
Import Your Database onto New Server
Now import your database onto the new server you wish to use. It is also crucial to understand that when performing such changes, there may be old domain name/location references that can remain within your WordPress database. This can actually cause potential issues in your display for links and themes. However, if you search and replace through the entire database, you can in turn cause data serialization issues. This is because certain WordPress themes and widgets are actually designed to store values with the URL marked length. This will break when you make changes so to avoid this, you can make use of these different options:
- Usage of plugin (Velvet Blues Update URLs or Better Search Replace) if access in WP Admin Dashboard is granted
- Usage of WP-CLI search replace if installation is done by you or hosting provider
- Usage of Search and Replace for Wordpress Databases Script if access to database administration is granted to 3rd parties
Migrating Your WordPress
- To move your Wordpress website to new locations on your domain server, you can create it using two options. Either you move your core files to the new directory or move it to a root directory. If you want to move it to a new directory, simply create a new one. If you want to shift it to your root directory, you will need to make sure that the files (index, htaccess etc) that may be copied over have been backed up and moved.
- Now log into the WordPress site and locate the administration section. You will then gain access to settings and general screen.
- Scroll until you see the box indicated for the Wordpress address and change it to the new location for your main WordPress core files. Do the same for your site address section as well and click on save changes so that the changes can be made.
- You will then have to move your core files to the appointed new location, including files that were found within the original directory as well as sub-directories.
- You can then test it out by opening your site through your domain name.com/(wp-login or wp-admin).php. Make sure to remove the brackets when testing it out.
- If you have permalinks, make sure to locate the settings tag and choose the permalinks option so that you can manually update your permalink structure under the htaccess file. Make sure all the images and links are updated to the new location through search and replace as well.
- For WordPress themes that support menus, locate the menu section through the appearance tab and update them again.
- You may also need to restart your domain server so as to prevent any errors.
Wrapping It Up
And this is how one exactly one is able to move their WordPress site to their new domain! By practicing all these steps, you will be able to successfully do so. In the event that a mistake is made, simply make use of your backups to revert it back to your previous WordPress website format and try again.
Author Bio: Alana Berge is the writer here. She is working for Awebstar- WordPress Development Company based in Singapore. She is self-motivated enthusiastic techie, spends most of her time in writing at AssignYourWriter as she works there as a content writer.
 Members Area


