 Members Area
Roughly 3.7 million sites on the web are constructed utilizing Bootstrap and 29% of the web utilizes WordPress. It is a valuable skill for the developers in the workplace to have a clear understanding of how to build websites and applications by using the two most robust, mature and open-source technologies - WordPress and BootStrap.
In this article, we will be taking a look at how to integrate your favorite theme into your WordPress website by making use of BootStrap.
Wordpress is open-source programming that is utilized to make a delightful site, application or blog. It is generally famous on account of its simple to utilize and ground-breaking choices for customization, extensibility, and appearance. Every one of the website admins with practically no coding experience can wamp up their sites with the assistance of an expert appearance and custom usefulness. The Wordpress topics can be legitimately acquired from the committed commercial centers or can be introduced from the official WordPress site. Then again, Bootstrap is a vigorous and exhaustive UI library for creating responsive and portable first sites and applications. It is a prevalent, open-source venture with broad improvement alongside consistent support.
Prerequisites
Before making a push forward, we accept you have an advancement domain with MySQL, PHP, and WordPress like Homestead Improved. This will assist you with saving time and run your program with a shiny new Homestead Improved Vagrant VM in the blink of an eye. Additionally, you should be comfortable with WordPress on the best way to introduce and actuate subjects, include WordPress menus, make pages and posts and substantially more. At last, you have to have a little information on how to construct a WordPress subject.
A WordPress subject contains a predefined document structure. You are required to have two documents for the subject to be perceived by WordPress. One is style.css which contains the styles for the subject and gives metadata in regards to the topic. Another is index.php - the primary WordPress topic document and the last fallback layout record for WordPress to depend on.
For a Bootstrap-empowered subject, we are going to include a couple of more records, for example, header.php and footer.php for spreading out the header and footer segments of our WordPress topic that are shown on each page of our topic. On the off chance that you are getting inquisitive about the topics, at that point, you can look at different layouts and alter them according to your needs from the WordPress docs. How about we begin with.
Step 1: Create a Theme Folder
At first, we need to select the WordPress installation folder and click on wp-content → themes. After this, make a folder for our topic and name it bs-theme.
Step 2: Add style.css
Let’s begin by creating our first file - style.css where we will store all of the custom CSS code. At the top of the stylesheet document without leaving any blank space, add the metadata about the theme between CSS comments. It is vital to remember that you need to replace the <AUTHOR_URI>, <THEME_URI>, and <AUTHOR_NAME> with your project-related values.
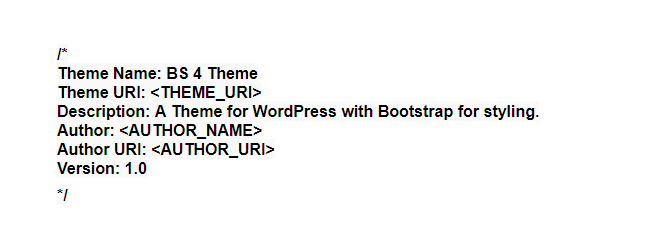
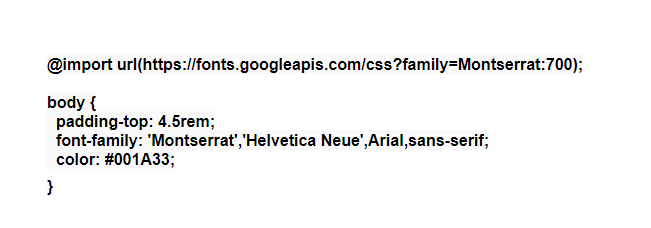
Now the WordPress can display the information of the theme in the admin area. You can likewise include our custom styles underneath the meta-information comments. For instance: This is how you can add a few CSS rules to style the <body>:
Step 3: Create the Header Section
Begin by creating header.php in the themes folder and then, input the below-given content in it.
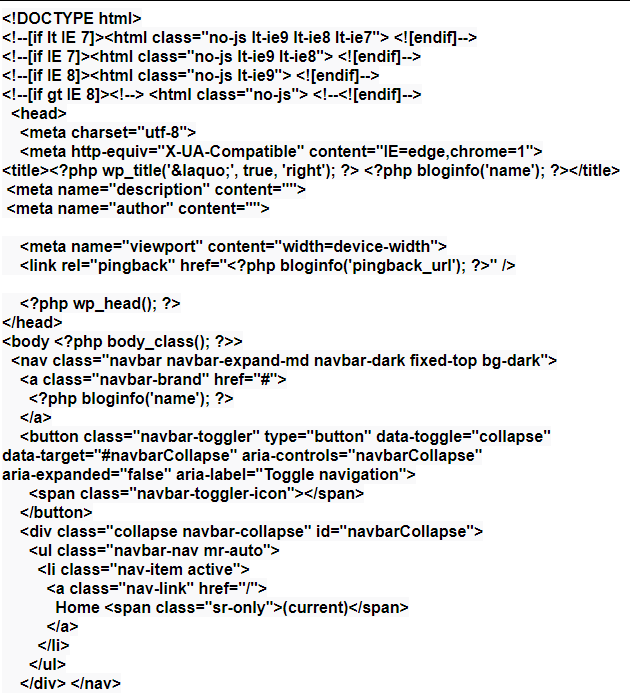
In the given code, most metadata for the HTML head segment is included utilizing variation WordPress labels like blog info('name') to get the site's name, wp_title() for the page title and wp_head for terminating the wp_head activity snare that is utilized by WordPress to include the connections and different functionalities to the head area. Likewise, we have utilized variation Bootstrap classes for making a responsive route bar. In any case, the route bar isn't dynamic. It isn't coordinated with the WordPress menu usefulness as we can't fabricate a WordPress menu in the administrator zone and get it showed toward the front of our site.
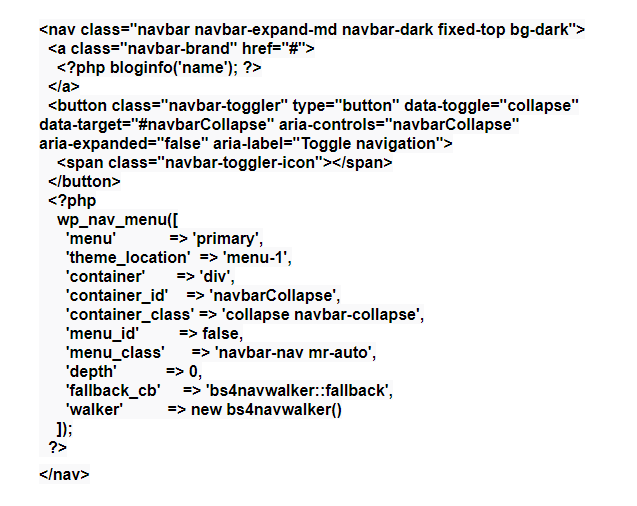
Step 4: Integrate Bootstrap Navigation with the WordPress menu
For achieving our assignment, we need a Wordpress walker class to give the designers a chance to cross tree-like information structures with a perspective on rendering HTML markup.
We will go with Dominic BS4navwalker which is available for free on Github. We snatch the bs4navwalker.php and spare it in the root index of your theme. Let’s create a functions.php file in the theme's root folder and paste the below-given line of code.
Step 5: Create a Footer Section
The subsequent stage is to make the footer.php record and duplicate glue the underneath given substance.
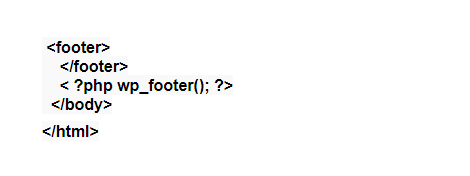
wp_footer() is utilized by WordPress for putting distinctive markup components powerfully by connecting them to template and JavaScript records at the base of the page. It is vital to note that multiple plugins make use of the wp_head() and wp_footer() hooks to get the required elements in the head and footer of the page. It is important to make sure that you add both the hooked in order to avoid any dysfunctionality of the plugins when you activate the theme.
Step 6: Add the index.php Template file
index.php is the second most crucial file for each WordPress theme, therefore, let’s go ahead and create it by adding the given content below:
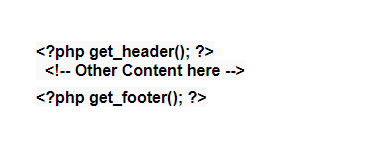
By making use of the get_header() and get_footer() to order WordPress for including the templates which you have created in the past, header.php, and footer.php inside index.php.
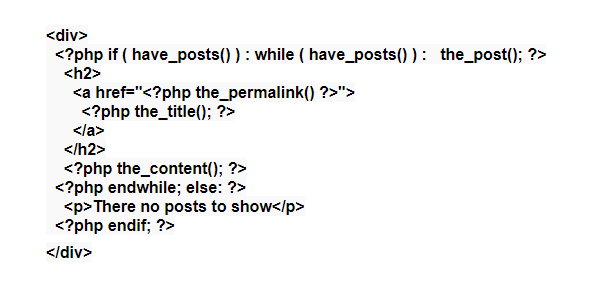
Step 7: Add the WordPress Loop
You need to paste the below-given code in the index.php file which is located between the header and footer tags.
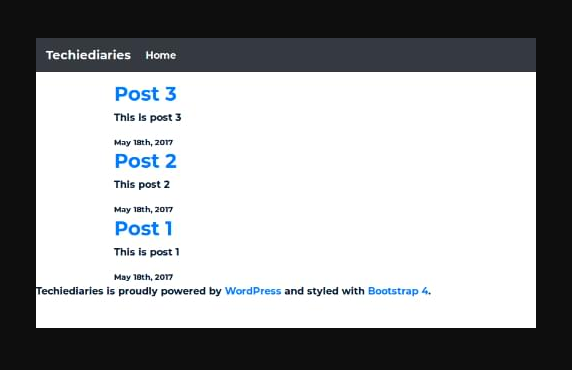
Step 8: Add the Bootstrap
After including the template files, you can activate a good starting theme using the Appearance menu in the admin panel. If we preview our theme then we can get an unstyled website that looks as given:
Wrap Up
Here, we come to the end of the article. We hope you have seen how to make a straightforward WordPress subject for coordinating the most recent rendition of Bootstrap. With this new expertise added to your engineer repertoire, you are presently prepared to make an astounding Bootstrap-based WordPress topic and appreciate the appealing highlights. Till then - keep learning!
Author Bio: Charles Richard works as a Business Analyst at TatvaSoft UK, a software development company based in London. Apart from his daily job Charles likes to explore e-commerce trends and best practices. He has published authorship bylines in many major publications, including Quirks, Search Engine Watch, YourStory and more. To know more about his company, please visit https://www.tatvasoft.co.uk/
 LogicRays Technologies
4 years ago
LogicRays Technologies
4 years ago


