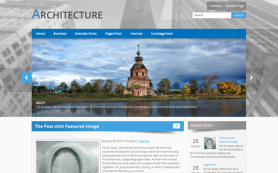
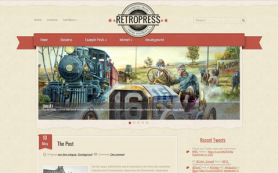
Are you a professional photographer or a passionate hobbyist? Do you travel half way across the world to snap some of the most fascinating images or do you prefer to focus on your everyday reality? Whatever the answers, if you want to craft your WordPress portfolio, an expert from WriterCheap is here to help.
Photography like any art is very individual. So, it is up to you to choose color over sepia or portraits over landscapes. This article just means to give you some guidelines on how to make your creations look the part in your online portfolio. Even the best art can be bleak if you don’t know how to display it on your site.
There are multiple advantages to setting up your photography portfolio, from finding potential clients to simply having a place to organize your creations. Once you have a clear purpose in mind, you can move on to buying a domain name and a web hosting. Then just install WordPress and embark on a journey.
Themes
Open your WordPress dashboard. Click on Appearance and then Themes. Then proceed to Add new, choose the theme which looks the best and upload it. Click Activate.
It is a simple process, but as you might suspect there is more to it. There are numerous fascinating themes to choose from. Many are free, for some you need to pay. It is easy to get lost amidst all this variety. So, how do you choose the one among so many contenders?
You can, of course, trust your intuition. Having a creative personality, you would probably enjoy assessing different preview themes based on their design. The problem is that there is more to a theme than just that. For instance, while you may like an intricate design, it may not be as easy to utilize for your user.
Moreover, minimalism has been in trend for the past couple years, so if you want your portfolio to look modern, you should probably consider it. It is especially important if your target audience is Internet natives, meaning younger people who are more likely to spot an outdated layout.
You should also take into account the loading speeds as well as the functionality. While many themes come equipped with a variety of widgets, those can slow your website down. At the same time, you do not want a theme without a WooCommerce plugin when your goal is to sell your creations.
Basically, the more features the theme has, the slower the loading speeds (unless the theme allows for a good image optimization such as Pinhole). Tradeoffs are inevitable, so you should just be mentally prepared for it.
The last but not least point to consider is how well your theme works with mobile devices. This is extra significant for those whose target audience is millennials, who are known for their attachment to phones. So, make sure you do not just follow your creative impulses but also consider technical details when selecting a theme.
Customize
After you choose a theme, you can also click to customize it. You will be directed to the Site Identity page, where you can select your logo. Then you can either download a free template or create your own. Of course, it is always better to have an original logo. But if you are not a designer, it can be quite costly.
There you can also name your site as well as add a tagline. Both should be short, simple and punchy. Do not try to be all fancy, especially if your goal is to reach out to people. At the same time, try to be unique with your wording and avoid commonplace phrases. Your goal is to leave an impression while also to share a clear message.
You can also try to customize your chosen theme in terms of color, background image and CSS if you are familiar with website design. For instance, you can make the colors of your images warmer if you are a wedding photographer or more intense if you want to go for the party spirit.
Customization options depend on the theme you opt for, so make sure you check them before making this very important choice. In any case, you can always go back and edit. This should not be a problem when you’ve got unlimited time on your hands. And most importantly, don’t forget to save your changes.
Plugins
Once you select and customize your theme, it’s time to click on the Plugins tab. While themes provide a layout for your website, plugins actually make it functional. There are many free plugins available for download, but you should, of course, filter only those which work for a photo portfolio.
You can just type photography in the search bar, and you will get all the relevant results. You can choose the one which looks most appealing based on its ratings, reviews, compatibility with your theme and WordPress version, popularity and update time. Then you just install and activate it.
It is important to note that while most plugins are free, it is still worth considering the paid versions. This is because plugins with bad coding can affect the security of your website. So, if you want to sell your photos or other works safely, sometimes it is better to overpay rather than underpay.
Homepage
Make your portfolio your homepage. When you install an Easy Photography plugin, it will be created automatically. But in any case, you can always add it via the Dashboard. The logic here is obvious: you want to sell yourself from the first click.
If you are a diverse photographer, you probably won’t be able to display all your creations on your homepage. Nor is it recommended, since a photographer without a clear identity simply does not look professional. You will need to opt for the best collection you’ve got, be it Arctic landscapes or city skylines.
Basically, you should choose your featured gallery. You will need to create different galleries for every subject. Once you install the plugin of your choice, the Gallery option should automatically pop up in your Dashboard. Then you can just click to Add Gallery and literally drag photos from a computer folder.
Galleries
Each gallery should have at least 8-10 photos. If you have fewer, it’s better to wait and take more because displaying only 3 images in a gallery looks highly unprofessional. Make sure your subjects are somewhat related. Having a wedding gallery right next to the Syrian war gallery looks a bit… inappropriate.
Speaking about galleries, it is best that all your images share the same tint, hue or shade. Having a super bright red picture next to a light green one does not look harmonious. It is also a good idea to mix the number of details in each photo, such as having a minimalistic image next to the one with many little objects.
Last but not least, avoid using carousels or image sliders. They tend to move too fast, and it annoys the end user. It’s better to opt for something simpler like a masonry-style layout. Just make sure not to have too many columns, or you will make your audience dizzy.
Be Personal
Everything from the name of your blog to your actual entries should reflect your personality or at least the brand you try to portray. Even if you are a photographer, you should still add a blog to your WordPress website and post there regularly.
People are fascinated with stories. Of course, some nations like Germans care more about practical aspects, but at their core all humans share a desire to connect. We’re social creatures and we want to hear about the world and people around us.
You should tell a story. That is why every time you post a new gallery or add to the existing one, it’s best that you make a blog entry about it. This will make your photos much more valuable in people’s eyes. Just take a look at Rob Walker’s investigation for proof.
These are some basic guidelines. But upon the whole, creating a WordPress photography portfolio is just as creative of a process as taking the photos. You should try to strike a golden middle between being personal and modern, original and user-friendly. Just don’t be afraid and experiment with different options.
 Members Area


