WordPress is obviously the most powerful and feature-rich content management system for building up an online presence. The platform has widespread popularity owing to the variety of customizable options under it, and accordingly, WordPress has become a first choice for the bloggers and web developers to build an online presence as per the requirements.
The platform is strengthened to such an extent that favors the creation of any blogs and websites related to e-commerce, news, magazines, shopping along with several other static as well as the dynamic online platforms.
This is the reason which has honored this content management system to be rewarded as the most powerful CMS and is being used by 27.7% of the websites all over the world.
And that’s the reason most of the serious blogger including myself start their blog with WordPress.
Soon after the installation of WordPress on the server, several essential settings are needed to be done over the platform to increase the website’s security, search engine optimization along with the giving it better design and premium performances.
The following list of 12 important steps is required to be followed after the installation of WordPress on the server:-
1. Modifying the default login page and re-structuring the URL:
Hackers act as unwanted mediums to instantly hack our valuable blogs and steal the important information from it. This is because the entire WordPress installation procedure is carried over the predefined default login page: yourdomainname.com/wp-login.php. It is suggested to change this URL by making it unique by installing a free plug-in called WPS Hide Login. Changing the default admin URL to a uniquely created name will benefit the blog in the following two respects:-
a) The hackers can not guess the admin URL, and the blog will be safe forever.
b) Bot traffics will be reduced from the software which is frequently used by the hackers for hacking purposes. Select Plugins and click on Add New – Install and activate WPS hide login – Click on Settings and scroll down to the bottom of the page – Change the default login URL and click on save.
2. Completion of the user profile:
The user’s profile is needed to get completed by the authorized user. For the same, it is required to put the mouse pointer to Users and click on Your Profile option. Finally, the required details such as first and last name, display name, site URL, author bio, and social media account links can get updated and saved accordingly for the sake of simplicity and further convenience.
3. Setting up the WordPress address and site address:
WordPress provides the users with a facility to select either www or nothing before the chosen domain name. The selection makes no difference at all, but it is required to submit the similar address while submitting to search engines, blog commenting, building backlinks or other concerned processes as Google treats different web addresses differently.
4. Setting up the WordPress permalinks:
Blogs get priority in ranking if the main keywords are included in the permalinks. For setting up the same, click on settings and chose the Permalinks option. The best and recommended structure is to select the radio button with the option Post Name and edit the best-suited permalink.
5. Setting up the proper date and time format:
Proper setting up of the date and time format is required to be done by getting into Setting and selecting General. The appropriate format can be chosen by selecting the desired radio button.
6. Enabling and disabling user registration:
The feature can be accessed easily under Settings and clicking on the option Membership. The feature plays a vital importance for those who either want any of the users to have an access of their blog via subscribing or who do not want any more users to get subscribed and comment over the posts. Accordingly, the options can be chosen and implemented.
7. Commenting settings:
There exist several options for comment settings which can be accessed by clicking the Setting and choosing the Discussion option. The users can set their priority for blog commenting as per their requirements by ticking the appropriate checkbox.
8. Media settings under WordPress:
The option can be used to edit or change each image format’s size or can even be set to 0 not to allow the CMS to create multiple image files and increase the load over the server. The users can go to Settings and click Media to access the option and use accordingly.
9. Changing the default Category name and adding as required:
The WordPress default category name is ‘Uncategorized’ which can modified by the user as per their requirements to group all post of the same type under a specific category. For accessing the option, go to Posts and select the option Category. Add the category and slug as per the requirements and proceed.
10. Installing Backup plugin:
The installation of Backup plugin makes the website secured over the hosting server or even over our personal computers. Websites can anytime get crashed or broken due to the unwanted activities such as using an outdated theme or the plugin. After setting up the daily or weekly backup schedule, the website can be kept safe and sound and get accessed in case of a crash. Backup WordPress is a free plugin which is recommended to get installed soon after the WordPress installation process.
11. Selecting the most appropriate theme:
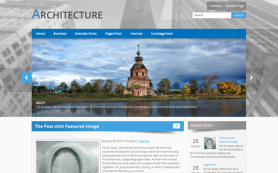
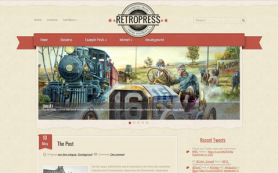
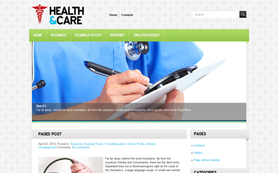
WordPress offers over 3000 free themes and more than 100 premium or paid themes for the users to get them activated as per the requirements. Users must be careful enough while activating the themes for their blogs or websites as per the structure. It is obvious to activate a newspaper type of theme for a news-related website, the simple blogging theme for a simple blog structure, the e-commerce based theme for shopping websites etc to name a few. Better the theme, more number of users will get attracted, and more will be the popularity of the website.
12. Installing essential and deleting unnecessary plugins:
It is necessary for the users to install the essential and remove the unnecessary plugins for making the site interface smart in all aspects. Some of the recommended plugins which needs to get installed after WordPress installation includes Akismet Anti-Spam, SEO by Yoast or All-in-one-SEO along with the great caching plugins including W3 Total Cache or WP Super Cache. There exist more than 45000 free and over 1000 paid plugins which can be effectively installed inside the platform for making the website work conveniently.
 Members Area


